Replacing a plate in a gasketed plate heat exchanger requires more than measuring its height and width. Two plates can look almost identical but differ in corrugation patterns, port arrangements, gasket grooves, pressing geometry, or material specifications. Even small differences can prevent correct assembly or affect thermal and hydraulic performance.
For maintenance engineers, purchasing managers, distributors, and industrial equipment buyers, accurate plate identification is essential when sourcing replacement heat exchanger plates. An incorrect plate may cause assembly problems, external leakage, cross-contamination between fluid circuits, or reduced heat-transfer performance.
This guide explains how to measure a heat exchanger plate, which dimensions matter, how to identify the correct replacement, and what information to provide when requesting a quotation from a heat exchanger supplier.
Quick Answer: How Do You Measure a Heat Exchanger Plate for Replacement?
To measure a heat exchanger plate for replacement, first identify the heat exchanger manufacturer and model, then record the plate’s overall dimensions, port locations, port diameters, gasket arrangement, corrugation pattern, and material specifications.
For the most reliable replacement, compare the measurements with the original plate drawing or a verified compatible part. Overall height and width alone are not sufficient to establish compatibility. Plate thickness, pressing geometry, gasket design, flow-channel configuration, and port details must also match the intended heat exchanger design.
Before ordering, prepare:
- Heat exchanger manufacturer, model, and serial number, if available.
- Overall plate height and width.
- Plate thickness, where it can be measured reliably.
- Port diameters and centre-to-centre positions.
- Gasket type, groove geometry, and gasket arrangement.
- Corrugation pattern and pressing orientation.
- Plate material and any special surface or corrosion requirements.
- Photographs and the original plate identification code, if available.
If the original plate is badly deformed, corroded, or incomplete, use the equipment drawings and manufacturer’s documentation rather than relying on measurements alone.
1. Identify the Heat Exchanger Plate Before Measuring
The first step is to establish which type of plate you need. Different heat exchanger designs use different plate geometries, and measurement methods depend on the construction.
1.1 Identify the Plate Heat Exchanger Type
A gasketed plate heat exchanger typically consists of a frame, a plate pack, gaskets, tightening bolts, and connections. Each plate forms part of a channel through which one of the process fluids flows.
However, not every plate heat exchanger uses the same plate construction.
| Plate Type | Typical Construction | Replacement Considerations |
|---|---|---|
| Gasketed plate | Pressed metal plate with gasket grooves and port openings | Plate profile, gasket compatibility, port arrangement, and pressing geometry must match |
| Brazed plate | Pressed plates permanently joined by brazing | Usually replaced as a complete heat exchanger rather than as an individual plate |
| Welded plate | Plates joined by welding in the designed assembly | Replacement scope depends on the specific construction and manufacturer’s repair procedures |
| Semi-welded plate | Selected plate pairs welded together, with gaskets used elsewhere | Plate-pair arrangement, gasket configuration, and fluid circuit assignment must be confirmed |
| Wide-gap plate | Plate geometry designed for fluids containing fibres or larger suspended particles | Channel geometry, gap dimensions, and port arrangement are particularly important |
Practical recommendation: If the equipment is a brazed plate heat exchanger, do not assume that an individual plate can be replaced in the same way as a plate in a conventional gasketed unit. Many brazed units are repaired or replaced at assembly level.
1.2 Locate the Equipment Nameplate
Before removing a plate, record the information on the heat exchanger nameplate.
Look for:
- Manufacturer or brand.
- Model or type designation.
- Serial number.
- Manufacturing year, if shown.
- Design pressure.
- Design temperature.
- Relevant equipment identification or product code.
The model and serial number may help identify the original plate drawing, gasket type, plate material, and approved replacement options.
A plate code stamped or marked on the plate itself can be even more useful. Photograph all visible markings before cleaning the component.
1.3 Why Visual Similarity Is Not Enough
Problem: A replacement plate has the same approximate height and width as the original but does not fit properly.
Why it happens: The plates may have different corrugation angles, port positions, gasket grooves, pressing depths, or edge profiles.
How to solve it:
- Compare the plate identification codes.
- Check the original equipment drawing.
- Photograph the plate from both sides.
- Compare port and gasket geometry.
- Confirm compatibility with the intended plate pack and gasket system.
What to provide to the supplier: The equipment model, plate markings, photographs, measured dimensions, and any available original drawings.
Example: A maintenance team removes a damaged plate from a gasketed exchanger and orders a visually similar plate from a different product series. Although the outside dimensions appear correct, the gasket groove differs, preventing the gasket from seating properly. Verifying the plate series before ordering could prevent this mismatch.
2. How to Measure the Overall Height and Width of a Heat Exchanger Plate
The overall height and width provide the starting point for plate identification. These measurements help narrow the range of possible replacement plates but do not establish compatibility by themselves.
2.1 Measure the Overall Plate Height
Place the removed plate on a clean, stable surface without forcing it flat.
Measure the maximum overall dimension from the top edge to the bottom edge. Identify the actual plate boundaries rather than measuring only the corrugated area.
Record the measurement in millimetres.
For international purchasing, you may also record inches:
- 1 inch = 25.4 mm.
- Convert millimetres to inches by dividing the measurement by 25.4.
For example, a measured height of 1,000 mm is approximately 39.37 inches.
This is only a unit conversion example, not a standard plate size.
2.2 Measure the Overall Plate Width
Measure from the leftmost to the rightmost edge of the plate.
Depending on the plate design, the overall width may include port regions, side edges, or other formed sections. Use the same reference points when comparing the replacement plate with the original drawing.
Record whether the measurement includes any projecting features or whether it refers only to the main plate body.
2.3 Record the Measurement Method
A useful measurement record should state:
- Measurement value.
- Unit.
- Measurement reference points.
- Measuring instrument.
- Any visible deformation or damage.
- Whether the plate was measured before or after cleaning.
For a straightforward plate, a steel rule or tape measure may be sufficient for preliminary identification. A calibrated measuring tool is more appropriate when dimensional tolerances are critical.
Do not attempt to flatten a deformed plate simply to obtain a preferred measurement. Uncontrolled bending can damage the plate and make the resulting dimensions misleading.
2.4 Overall Dimensions: What to Check
| Measurement | How to Measure | Why It Matters |
|---|---|---|
| Overall height | Maximum top-to-bottom dimension | Helps identify the plate size and series |
| Overall width | Maximum left-to-right dimension | Helps establish the plate’s general geometry |
| Plate body dimensions | Main formed area, excluding features where appropriate | Helps compare pressing geometry |
| Edge profile | Inspect and photograph the plate perimeter | Different edge shapes may indicate different plate designs |
| Plate thickness | Measure at an appropriate accessible location | Helps identify material thickness, subject to measurement limitations |
| Plate condition | Record bending, wear, corrosion, and damage | Damaged plates may not provide reliable reference dimensions |
Important: A plate’s overall dimensions should be checked against the original drawing or a verified reference plate. Different manufacturers may use similar nominal sizes for incompatible designs.
3. How to Measure Port Diameter and Port Position
Port geometry is one of the most important parts of heat exchanger plate identification. The ports connect the plate channels to the inlet and outlet connections and help determine the fluid-flow arrangement.
A replacement plate with incorrect port geometry may not align with the frame connections or may not distribute fluid as intended.
3.1 Measure the Port Diameter
Identify each port opening and measure its diameter.
Depending on the port design, useful measurements may include:
- Inside diameter of the opening.
- Diameter of any formed port collar.
- Outside diameter of the port region.
- Diameter and shape of any gasket sealing surface.
Do not assume that the visible opening diameter is the same as the nominal connection size. The connection, port, and sealing geometry may have different dimensions.
If the port is deformed or corroded, compare it with an undamaged port or consult the original drawing.
3.2 Measure Port Centre-to-Centre Distances
For a four-port plate, label the ports consistently before measuring.
For example:
- Port A: upper left.
- Port B: upper right.
- Port C: lower left.
- Port D: lower right.
Then measure the relevant distances between port centres.
Depending on the plate layout, these may include:
- Horizontal centre-to-centre distance between the upper ports.
- Horizontal centre-to-centre distance between the lower ports.
- Vertical centre-to-centre distances.
- Diagonal distances, if needed to verify the port layout.
A measurement sketch with labelled reference points is more useful than a list of unexplained numbers.
3.3 Record Port Orientation
Some plates have symmetrical port arrangements, while others have different configurations or markings that determine their orientation in the plate pack.
Photograph the plate in its installed orientation and identify which side faces the frame or the adjacent plate.
Do not assume that turning a plate over or rotating it will preserve compatibility. The plate may have different gasket seating, port connections, or flow-channel geometry on each side.
3.4 Port Measurement Checklist
| Item | Required Information |
|---|---|
| Port count | Number of ports on the plate |
| Port identification | Consistent labels for each port |
| Port diameter | Opening diameter and relevant sealing dimensions |
| Horizontal spacing | Centre-to-centre distance between relevant ports |
| Vertical spacing | Centre-to-centre distance between relevant ports |
| Port shape | Circular or other specified geometry |
| Port orientation | Position relative to the plate top, bottom, and marked side |
| Port condition | Deformation, erosion, corrosion, or other visible damage |
Problem: A replacement plate has the correct overall dimensions but cannot be installed correctly.
Why it happens: Port positions or port sealing details differ from those of the original plate.
How to solve it: Compare the complete port layout with the original drawing. If the unit uses a proprietary plate series, obtain confirmation of the exact part designation.
What to provide to the supplier: A labelled port diagram, diameter measurements, centre-to-centre distances, photographs, and the equipment model.
4. How to Identify Corrugation Pattern and Plate Pressing Geometry
Corrugation geometry is a defining feature of a heat exchanger plate. The pressed pattern affects mechanical stiffness, channel geometry, fluid distribution, heat-transfer performance, and pressure drop.
Two plates with identical outside dimensions can perform differently if their corrugation patterns or pressing geometry differ.
4.1 What Is a Heat Exchanger Plate Corrugation Pattern?
Most gasketed plate heat exchangers use pressed metal plates with a corrugated surface. The corrugations form flow channels between adjacent plates and influence turbulence and heat transfer.
Common plate designs may include:
- Chevron or herringbone patterns.
- Different corrugation angles.
- Different corrugation depths.
- Different pressing patterns.
- Special channel geometries for particular applications.
The exact terminology and geometry vary by manufacturer and product series.
4.2 Can You Measure the Corrugation Angle?
The apparent corrugation angle may help distinguish plate designs, but measuring it from a photograph or a deformed plate can be unreliable.
If the angle is required, establish the manufacturer’s reference definition and measurement method. A plate drawing or verified specification is preferable to an approximate visual measurement.
A corrugation angle should not be treated as the only identifier. Plates with similar visible patterns may still differ in depth, contact points, port regions, or overall pressing geometry.
4.3 Why Corrugation Geometry Matters
Thermal performance: The pattern influences turbulence and the heat-transfer coefficient.
Pressure drop: Greater flow resistance may increase pressure drop, depending on channel geometry and operating conditions.
Mechanical stability: Contact points between adjacent plates help support the plate pack under the intended operating conditions.
Flow distribution: Plate geometry affects the way fluid moves through the channels.
Plate compatibility: Different pressing patterns may not form the intended channels when assembled together.
A replacement plate should therefore match the original design rather than simply look similar.
4.4 What If the Original Plate Is Damaged?
A corroded, collapsed, or severely deformed plate may not provide reliable information about its original geometry.
In this situation:
- Photograph the plate from both sides.
- Record the plate markings.
- Measure undamaged reference areas where possible.
- Compare the plate with an undamaged plate from the same pack, if available.
- Request the original drawing or a verified replacement identification from the equipment manufacturer or supplier.
Do not reconstruct critical pressing dimensions from a badly damaged plate unless a qualified engineering process establishes that the measurements are reliable.
5. How to Measure and Verify the Heat Exchanger Plate Gasket
The gasket is a critical part of a gasketed plate heat exchanger. It provides sealing between adjacent plates and around designated port regions.
A plate may have the correct overall dimensions and port layout but remain incompatible if its gasket arrangement or groove geometry differs.
5.1 Identify the Gasket Type
Common gasket arrangements include:
- Clip-on gaskets.
- Glued gaskets.
- Other manufacturer-specific attachment designs.
The exact arrangement depends on the plate series.
When inspecting the gasket, record:
- Gasket material, if known.
- Attachment method.
- Overall gasket path.
- Port gasket arrangement.
- Visible identification marks.
- Evidence of hardening, cracking, swelling, or compression damage.
The gasket material must be suitable for the process fluid, operating temperature, cleaning chemicals, and operating conditions.
Common elastomers used in heat exchanger gaskets include EPDM, NBR, and FKM, but these materials are not interchangeable in every service.
5.2 Inspect the Gasket Groove
The gasket groove is formed into the plate and determines how the gasket is positioned and retained.
Inspect:
- Groove path and continuity.
- Groove width and depth, where measurable.
- Corners and port sealing regions.
- Clip or attachment features.
- Signs of corrosion or mechanical damage.
- Differences between the two plate faces.
The dimensions should be compared with the original drawing or a verified compatible plate. Groove measurements taken from a worn or distorted plate should be treated as preliminary.
5.3 Why Gasket Compatibility Matters
An incompatible gasket may:
- Fail to sit correctly in the groove.
- Shift during plate-pack assembly.
- Create external leakage.
- Allow unwanted fluid mixing if internal sealing fails.
- Require excessive compression or prevent correct tightening.
A gasket should not be forced into a groove simply because its overall length appears suitable.
5.4 Plate and Gasket Replacement: What Should You Order?
The answer depends on the equipment condition and manufacturer recommendations.
| Situation | Possible Replacement Scope |
|---|---|
| One damaged plate, gasket otherwise suitable | Replacement plate and any gasket required for that plate |
| Multiple aged or damaged gaskets | Gasket replacement for the specified portion or entire plate pack |
| Unknown plate series | Identification and compatibility confirmation before ordering |
| Corrosion affecting plate and gasket seating | Engineering assessment of the plate, groove, and gasket |
| Complete plate-pack overhaul | Coordinated plate and gasket review based on the original design |
Do not assume that every gasket must always be replaced when one plate is damaged. Equally, do not assume that old gaskets remain suitable simply because they appear intact.
The appropriate scope depends on the gasket condition, maintenance strategy, equipment instructions, and operating requirements.
6. Plate Thickness, Material, and Other Specifications to Confirm
Dimensions alone cannot establish whether a replacement plate is suitable for the intended service.
The material grade, thickness, pressing design, and operating conditions must also be confirmed.
6.1 How to Measure Plate Thickness
Heat exchanger plates are often relatively thin, and corrugations make thickness measurements more difficult than measuring a flat metal sheet.
If practical, use an appropriate thickness-measuring instrument at a suitable accessible location. Confirm whether the instrument measures the actual sheet thickness or is influenced by the formed geometry.
Do not use the total corrugation depth as the plate thickness.
For a corroded or heavily deformed plate, the remaining thickness may be lower than the original nominal thickness. In that case, the original material specification or manufacturer drawing is a more reliable reference for replacement.
6.2 Common Heat Exchanger Plate Materials
| Material | Typical Considerations |
|---|---|
| Stainless steel 304/304L | Used in selected applications with suitable fluid chemistry |
| Stainless steel 316/316L | Often considered for improved resistance to certain corrosive environments |
| Titanium | Used in selected services requiring high resistance to certain chloride-containing environments |
| Nickel-based alloys | Considered for demanding chemical and corrosion conditions |
| Other specified alloys | Selected according to process compatibility, temperature, pressure, and manufacturer design |
Material selection should account for the actual fluid composition, temperature, contaminants, cleaning chemicals, and any risk of localized corrosion.
For example, 316L stainless steel is not automatically suitable for every seawater or high-chloride application. Titanium may be appropriate in some such services, but its suitability must also be verified for the specific process environment.
6.3 Plate Specifications to Confirm
| Specification | Why It Matters | How to Verify |
|---|---|---|
| Manufacturer and model | Identifies the intended plate series | Nameplate and equipment records |
| Plate code | May identify the exact plate design | Stamped or marked code |
| Overall height and width | Establishes general size | Measurement and original drawing |
| Plate thickness | Affects construction and compatibility | Drawing or appropriate thickness measurement |
| Port diameter | Affects flow opening and sealing | Measurement and drawing |
| Port centre distances | Establishes port geometry | Labelled dimensional sketch |
| Corrugation pattern | Affects channels and performance | Plate code, drawing, or verified reference |
| Gasket groove | Determines gasket compatibility | Drawing and physical inspection |
| Material grade | Affects corrosion resistance | Original specification and material documentation |
| Plate orientation | Affects assembly and flow arrangement | Original assembly drawing |
| Operating conditions | Establishes service suitability | Equipment documentation and process data |
7. Common Mistakes When Measuring a Heat Exchanger Plate
Mistake 1: Measuring Only Height and Width
What buyers do: Record two overall dimensions and order a plate with similar measurements.
Why it causes problems: The port layout, corrugation geometry, and gasket groove may be different.
What to do instead: Verify the complete plate design using a manufacturer code, original drawing, or confirmed compatible part.
Mistake 2: Measuring a Deformed Plate as If It Were New
What buyers do: Use a bent or collapsed plate as the sole reference for replacement dimensions.
Why it causes problems: Damage can change the overall dimensions and distort the port and gasket geometry.
What to do instead: Use an undamaged plate from the same pack, if available, and compare the measurements with the original documentation.
Mistake 3: Ignoring the Gasket Groove
What buyers do: Confirm the outside dimensions and assume the gasket will fit.
Why it causes problems: Groove geometry and gasket attachment details vary between plate designs.
What to do instead: Record the gasket arrangement and confirm the groove design before ordering.
Mistake 4: Confusing Port Diameter With Connection Size
What buyers do: Use the nominal pipe connection size as the port diameter.
Why it causes problems: The port opening, gasket sealing surface, and external connection may have different dimensions.
What to do instead: Measure the port opening and sealing region separately where necessary, then compare them with the original drawing.
Mistake 5: Assuming All Stainless Steel Plates Are Equivalent
What buyers do: Replace a plate with any available stainless steel option.
Why it causes problems: Alloy grades have different corrosion resistance, and the pressing geometry may also differ.
What to do instead: Confirm both the exact material specification and the plate design.
Mistake 6: Ignoring Plate Orientation
What buyers do: Assume the replacement plate can be installed in any orientation.
Why it causes problems: Plate faces, port arrangements, gasket paths, and flow-channel geometry may be orientation-dependent.
What to do instead: Photograph the installed orientation and confirm the assembly arrangement before removal.
Mistake 7: Ordering From Photographs Alone
What buyers do: Send one photograph and ask for an equivalent plate.
Why it causes problems: Photographs rarely reveal all dimensions, material details, groove geometry, or pressing specifications.
What to do instead: Provide photographs alongside equipment identification, measurements, drawings, and plate markings.
Mistake 8: Failing to Confirm the Replacement Plate’s Performance Compatibility
What buyers do: Assume that any plate that fits will provide the original heat-transfer performance.
Why it causes problems: Differences in corrugation geometry or channel arrangement can change thermal and hydraulic characteristics.
What to do instead: Confirm that the replacement is approved or verified for the specific plate series and application.
8. Should You Replace One Plate or the Entire Plate Pack?
The correct replacement scope depends on the damage, the age and condition of the plate pack, the availability of compatible components, and the maintenance objectives.
8.1 When Replacing One Plate May Be Appropriate
Replacing an individual plate may be reasonable when:
- The damage is limited to a clearly identified plate.
- Compatible replacement plates are available.
- The remaining plates are in acceptable condition.
- The original plate design can be verified.
- The maintenance procedure permits individual plate replacement.
Before reinstalling the exchanger, inspect the associated gasket and adjacent plates as appropriate.
8.2 When a Broader Replacement May Be Worth Considering
A larger replacement scope may be appropriate when:
- Multiple plates show significant corrosion or deformation.
- Gaskets have deteriorated throughout the pack.
- Replacement plates are difficult to identify individually.
- The exchanger no longer meets its required thermal performance.
- The maintenance history indicates recurring plate or gasket problems.
The decision should consider inspection findings, repair costs, downtime, and expected service life.
8.3 Individual Plate vs Complete Plate Pack
| Factor | Individual Plate Replacement | Complete Plate Pack Replacement |
|---|---|---|
| Initial component cost | Often lower if damage is isolated | Usually higher due to the larger scope |
| Compatibility requirements | Exact plate identification remains essential | Entire pack configuration must be verified |
| Maintenance scope | Focuses on the affected plate and related sealing | Allows broader assessment of plates and gaskets |
| Downtime | May be limited when parts and procedures are available | Depends on the scope of replacement and commissioning |
| Long-term condition | Depends on the condition of the remaining plates | Can address broader deterioration if the new pack is correctly specified |
| Best suited to | Isolated damage with a serviceable remaining pack | Widespread deterioration or a justified overhaul |
Neither option is universally better. The appropriate decision depends on the condition of the existing equipment and the total cost of maintaining reliable operation.
 9. How Much Does a Replacement Heat Exchanger Plate Cost?
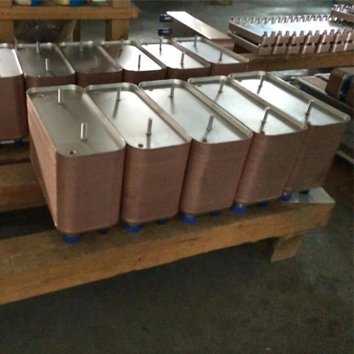 9. How Much Does a Replacement Heat Exchanger Plate Cost?
Replacement plate prices vary by manufacturer, model, material, plate geometry, order quantity, and supply conditions. A precise quotation requires sufficient information to identify a compatible plate.
9.1 Main Factors Affecting Price
| Factor | Cost Implication |
|---|---|
| Original manufacturer and plate series | Determines compatibility and the available sourcing options |
| Plate material | Specialty alloys may cost more than common stainless steel grades |
| Plate dimensions | Larger or more complex plates may require more material and processing |
| Corrugation geometry | Specialized pressing designs can limit compatible supply options |
| Gasket requirements | Gasket type and material affect the total replacement cost |
| Quantity | Larger orders may reduce unit costs, depending on supply and production arrangements |
| Documentation | Material certificates and specified inspection records can affect the quotation |
| Custom sourcing | Uncommon or discontinued plate designs may require additional identification and coordination |
| Packaging and freight | Weight, packaging, destination, and shipping method affect delivered cost |
| Delivery schedule | Urgent sourcing or special arrangements may affect total cost |
9.2 How to Compare Replacement Plate Quotations
Ask suppliers to confirm:
- Exact plate identification or verified compatibility.
- Material grade.
- Overall dimensions and critical geometry.
- Gasket inclusion and compatibility.
- Quantity.
- Required documentation.
- Packaging and shipping.
- Estimated delivery schedule.
- Any assumptions or deviations from the original specification.
A lower-priced plate is not necessarily a better purchase if its compatibility is uncertain. The total cost should account for the risk of incorrect parts, rework, downtime, and repeat maintenance.
10. Heat Exchanger Plate Replacement Checklist
Use this checklist before requesting a quotation.
Equipment Identification
Heat exchanger manufacturer.
Model or type designation.
Serial number or equipment tag.
Manufacturing year, if available.
Plate identification code.
Original equipment or plate drawing, if available.
Dimensional Measurements
Overall plate height.
Overall plate width.
Plate thickness or original specified thickness.
Port count and port diameters.
Port centre-to-centre distances.
Port shape and orientation.
Plate edge profile.
Corrugation pattern and orientation.
Gasket groove dimensions or verified groove identification.
Material and Sealing Requirements
Plate material grade.
Gasket material, if required.
Gasket attachment method.
Fluid compatibility requirements.
Operating temperature.
Operating pressure.
Corrosion or erosion concerns.
Relevant cleaning chemicals.
Commercial Requirements
Required quantity.
Individual plate or complete plate-pack replacement.
Required material documentation.
Inspection requirements.
Destination country.
Packaging requirements.
Required delivery date.
Any project-specific standards or purchasing conditions.
If the plate code and original drawing are available, provide them first. They may eliminate the need to establish every geometric feature manually, although critical compatibility should still be confirmed.
11. Frequently Asked Questions
1. How Do I Measure a Heat Exchanger Plate for Replacement?
Measure the overall height and width, port diameters, port centre positions, and other relevant dimensions. Also identify the corrugation pattern, gasket groove, material, and plate code. Confirm the measurements against the original drawing or a verified compatible plate before ordering.
2. Can I Replace a Heat Exchanger Plate Using Only Its Dimensions?
No. Overall dimensions alone do not establish compatibility. Port geometry, pressing pattern, gasket groove, plate material, and plate series must also match the intended design.
3. How Do I Find the Model Number of a Heat Exchanger Plate?
Check for markings stamped or printed on the plate, then inspect the heat exchanger nameplate for the manufacturer, model, and serial number. If the plate code is missing, use the original drawings, equipment records, and verified physical measurements to establish the correct part.
4. How Do I Measure the Port Diameter of a Heat Exchanger Plate?
Measure the actual port opening using a suitable measuring tool. If necessary, separately record the outside diameter of the formed port region and the dimensions of the gasket sealing area. Do not assume that the nominal pipe connection size equals the port opening diameter.
5. How Do I Identify a Heat Exchanger Plate Gasket?
Inspect the gasket material, attachment method, sealing path, port arrangement, and any identification marks. Compare these features with the original plate drawing or a verified replacement specification because visually similar gaskets may not fit different plate series.
6. Can Different Brands of Heat Exchanger Plates Be Interchanged?
Only when compatibility has been established for the specific application. Similar dimensions do not guarantee equivalent port geometry, gasket seating, corrugation design, plate-pack assembly, or thermal and hydraulic performance.
7. Can I Measure a Damaged Heat Exchanger Plate?
Yes, but the results may be unreliable if the plate is bent, collapsed, or corroded. Use undamaged reference plates and original drawings where possible, and treat measurements from damaged areas as preliminary.
8. What Tools Are Needed to Measure a Heat Exchanger Plate?
A steel rule, tape measure, caliper, suitable thickness gauge, camera, and dimensional sketch can support preliminary identification. More precise inspection tools may be needed when tolerances are critical. The required instruments depend on the geometry and measurement purpose.
9. How Do I Measure the Thickness of a Corrugated Heat Exchanger Plate?
Use an appropriate thickness-measuring method at a suitable location, accounting for the formed geometry. Do not confuse the overall corrugation depth with the metal sheet thickness. The original material specification is preferable when the plate is damaged or the nominal thickness is uncertain.
10. Should I Replace the Gasket When Replacing a Heat Exchanger Plate?
The decision depends on the gasket condition, maintenance requirements, and equipment manufacturer’s instructions. Inspect the gasket and confirm that it is compatible with the replacement plate. Replace damaged or unsuitable gaskets rather than reusing them solely to reduce initial cost.
11. Can I Replace One Plate Without Replacing the Entire Plate Pack?
Yes, in many gasketed plate heat exchangers, an individual plate can be replaced if a compatible part is available and the maintenance procedure permits it. The condition of the remaining plates and gaskets should be assessed before deciding on the replacement scope.
12. Are Brazed Plate Heat Exchanger Plates Individually Replaceable?
Generally, individual plates in a conventional brazed plate heat exchanger are not replaced using the same procedure as plates in a gasketed unit. The plates are permanently joined in the brazed assembly, so repair or replacement normally requires an assessment of the complete unit and the manufacturer’s available service options.
13. What Material Is Best for a Replacement Heat Exchanger Plate?
There is no universally best material. The correct grade depends on the process fluid, temperature, contaminants, cleaning chemicals, corrosion risks, and original exchanger design. Stainless steel, titanium, and specialty alloys are used in different services.
14. How Long Does It Take to Source a Replacement Heat Exchanger Plate?
The lead time depends on the plate series, availability, material, quantity, documentation, and shipping destination. Standard or readily identifiable plates may be easier to source than uncommon or discontinued designs. Confirm the actual delivery estimate after the supplier verifies the required part.
15. What Information Should I Send a Supplier for a Replacement Plate Quotation?
Provide the heat exchanger manufacturer and model, plate code, original drawing if available, measured dimensions, port layout, gasket details, material requirements, quantity, and destination. Clear photographs of both plate faces and any visible markings can help the supplier identify the correct component.
12. How to Choose a Reliable Heat Exchanger Plate Supplier
A suitable supplier should help verify the replacement plate rather than simply quote a component based on approximate dimensions.
Technical Identification and Communication
The supplier should review available equipment details, plate codes, drawings, and measurements. If critical information is missing, the supplier should identify what remains unverified before confirming compatibility.
Manufacturing and Sourcing Capability
For a trading or export company, ask how the replacement plate will be sourced and which manufacturing partner will supply it. The proposed partner should be appropriate for the required plate design, material, and quality requirements.
Material Documentation and Quality Control
Where required, confirm the material grade, available material certificates, dimensional inspection arrangements, and controls for preventing unauthorized material substitutions.
The necessary documentation depends on the application and purchase specification. Buyers should agree on the required records before ordering.
Gasket Compatibility
A supplier quoting a replacement plate should also clarify whether the gasket is included and whether the proposed gasket matches the plate groove and process conditions.
Confirm the gasket material’s suitability for the process fluid, temperature, and cleaning chemicals.
Packaging and International Delivery
Replacement plates must be protected against deformation, scratches, corrosion, and transport damage as appropriate to their material and geometry.
Confirm packaging, product identification, shipment documentation, delivery terms, and the process for resolving nonconforming parts.
Our Approach to Replacement Plate Sourcing
We work closely with qualified manufacturing partners and engineering teams to provide product sourcing, technical coordination, customization, quality control, and international export support.
For replacement heat exchanger plates, we can coordinate quotation preparation using available equipment details, plate markings, drawings, photographs, dimensions, and material requirements.
The proposed replacement should be checked against the original design or another verified compatibility reference before the order is finalized. Where information is incomplete, the remaining technical questions should be resolved before production.